Solve the Problem of How to Turn Off Win11 Auto-Updates
Like Windows 10, Windows 11 maintains a monthly update cycle. As a newer system, it sometimes receives patch updates even more frequently. Many users prefer not to have their systems automatically updated when everything is working fine—they want control, not forced updates. So, how can you disable automatic updates in Windows 11? Below, we’ll show you effective methods to completely turn off auto-updates in Win11.
Method 1: Use a Dedicated Tool (Highly Recommended)
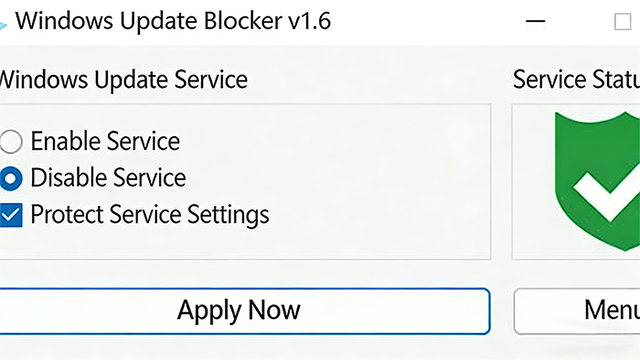
- Download a Windows 11 automatic update disabling tool (search for: Windows Update Blocker).
- Open the tool, select “Disable Service”, check “Protect service settings”, and click “Apply Now”. That’s it—it really works great!
Method 2: Manually Disable Automatic Updates
Part A: Pause Updates
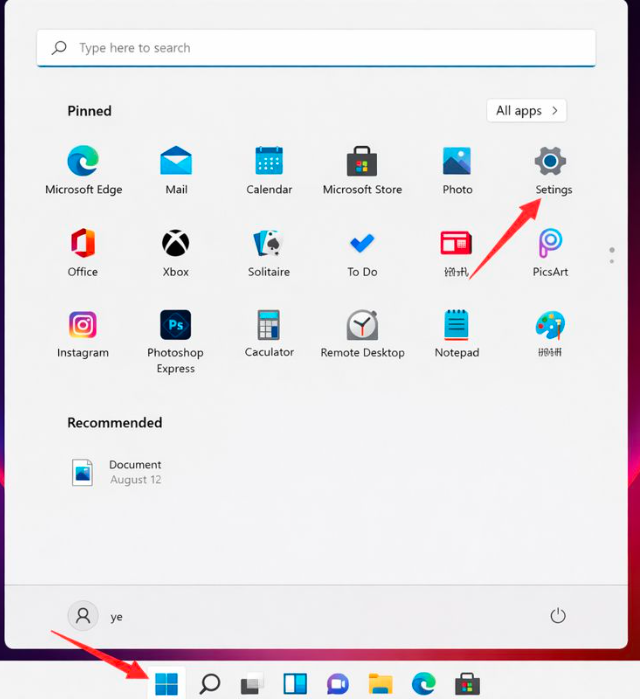
- Press the Windows key, or click Start on the taskbar, then open Settings from the app list.
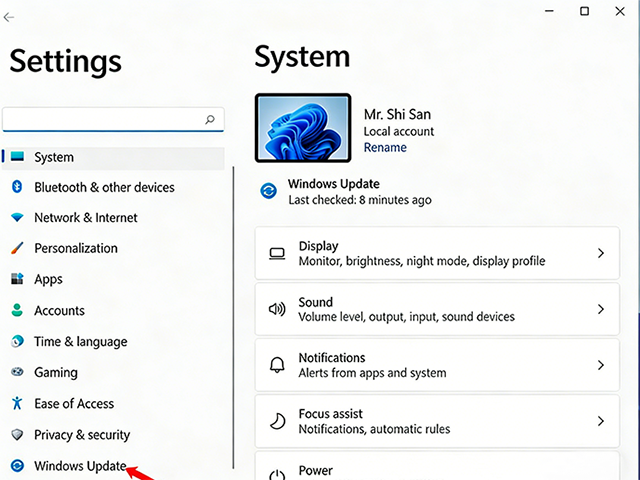
- In the Settings window (press Win + I), click Windows Update on the left sidebar.
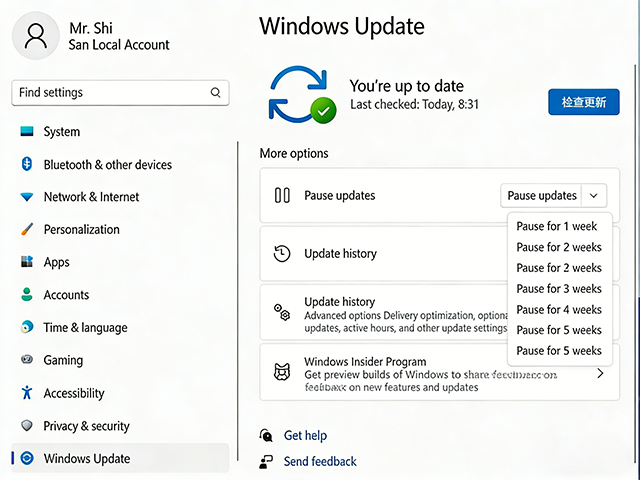
- Under More options in Windows Update, you can choose to Pause updates—with options ranging from a minimum of 1 week to a maximum of 5 weeks.
Part B: Disable the Windows Update Service
- Press Windows + R, type
services.msc, and press Enter.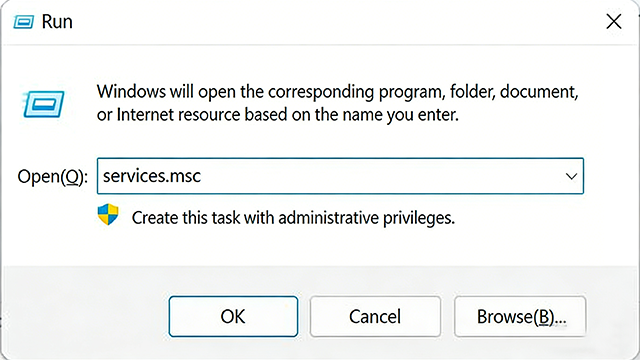
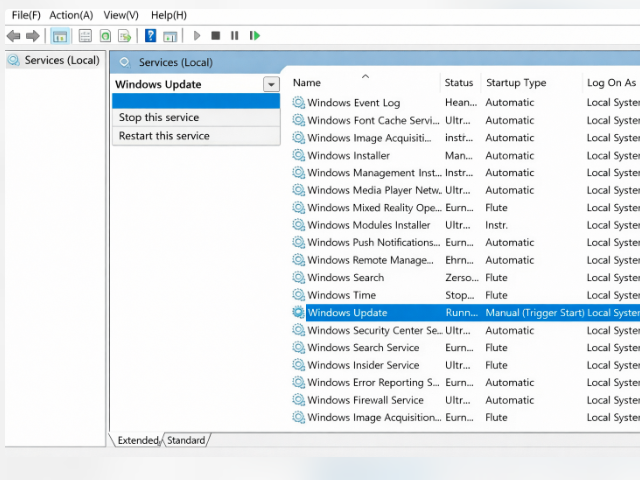
- In the Services window, locate Windows Update.
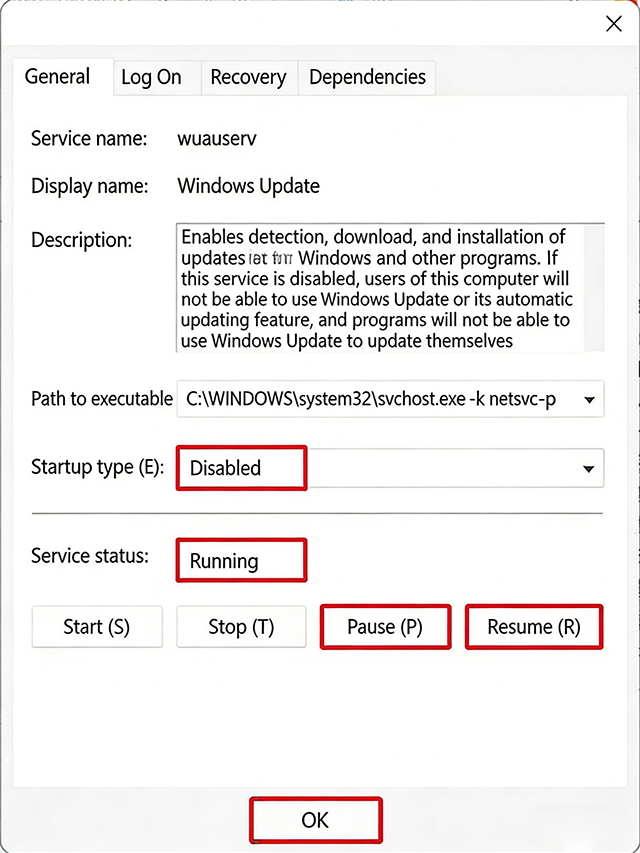
- Double-click it, click Stop to stop the service, and change the Startup type to Disabled.
That’s all! These are the methods to disable automatic updates in Windows 11. They’re essentially the same as those used in Windows 10. Have you mastered them yet? If you found this guide helpful, please follow our site for more tips!